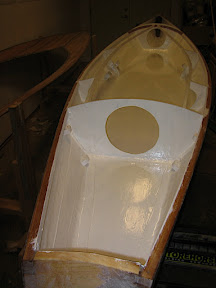
While the brushes are still wet, tape up the waterline and continue with white paint for the hull.
Wednesday, November 5, 2008
Stern plate
Slight delay...
Tuesday, February 5, 2008
Sea trial...
The proud but skeptical captain awaits his fate at sea... well worst case boat sinks and I stand up in 3ft of water and walk to shore. All things considered, she is very stable, you may not be standing up to fight that striper, but definitely stable enough to take the littleman off momma's hands on a sunny afternoon. She's quite nimble and tracks straight, this sea trial deemed a success!


Stern plate
Had to sure up the stern now that the sheer clamps are no longer attached together. This pine, stern plate (+ a little epoxy filler) ensures a true stern as well as a sturdy platform to attach a nice piece of hardwood to. But now, will she track straight? Will the extra drag slow her down? A sea trial is in order.


Tough decision
When the stern came together, it never lined up correctly ie perpendicular to the floor. It seemed to be favoring the port side, many conversations with esteemed captains, it was decided the stern must be attended to as it may make the boat go in circles. The thought of cutting off the stern was similar to hacking ones leg off. Finally, with enough courage, the Japanese saw was put to work. I took exactly 10 inches off from the tip of the stern on the bottom panel at a 30 degree angle towards the bow. The idea now is to find some nice dark hardwood and create a flat angled stern. This will also provide an area for some gold leaf lettering. The name 'HACK' seems fitting.


The deck removed
Subscribe to:
Comments (Atom)


